

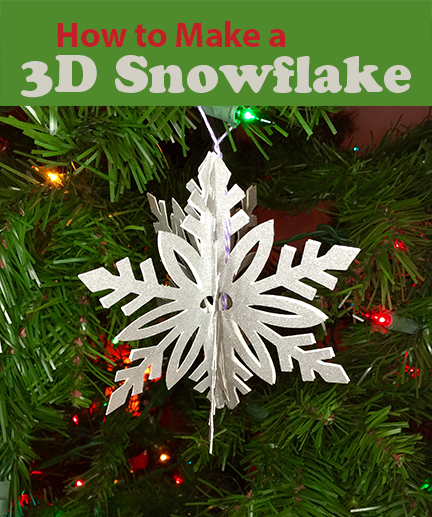
The thing I like most about snowflakes beside no two being alike is that they are great for winter decor. They work for Christmas, Hannakah, New Years, or a general winter theme.
Using any mirrored image, you can turn it into a 3D shape. Snowflakes work for this idea. In this post I will show how I took a simple snowflake cut in Design Space and by adding a score line then making multiple cuts, it can be turned into a 3D hanging decor.
Make one large snowflake to hang in a doorway or from a light fixture, or you can make multiples to hang all together to cover a larger area or make smaller versions for Christmas tree ornaments.
Read to the end of the post where you can enter to win a Cricut Maker Machine.
Materials:
- glitter cardstock - 2 sheets
- snowflake
- Personal Cutting Machine - I used a Cricut Explore Air 2
- glue
- twine, string, or fishing line to hang the Snowflake
I wanted to thank Cricut for providing my cutting machine in order to create posts using their products.
Directions:
This is an Explore Air 2 - Easy one-Cut Holiday project. One shape that is cut multiple times to make the ornament. In the video below you will see how you set up one snowflake to cut and then you can tell your machine to cut multiples of that one image. The software knows where to place it on the mat to use the optimal amount of surface space without wasting any materials.
The following video will show you how I set up the snowflake file in Design Space.
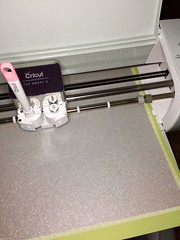
Cutting the snowflake shapes on my Cricut Explore Air 2.
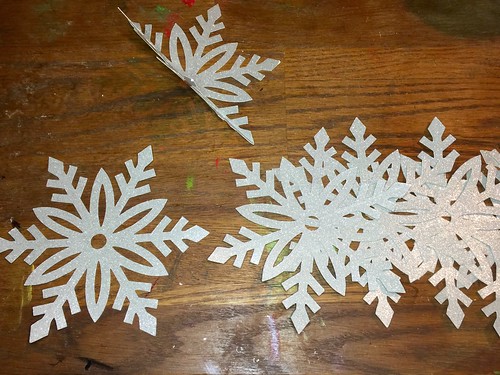
The cut snowflakes, starting to fold them in half. This task needs to be done gently.
A folded snowflake.
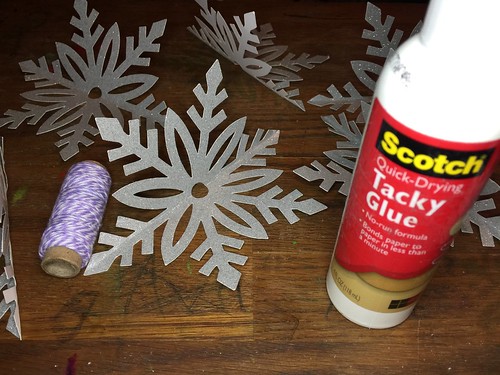
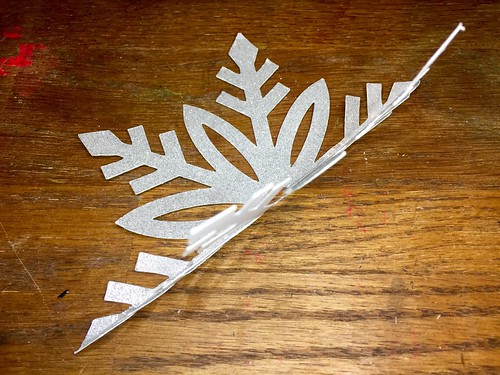
Attach the folded snowflakes with glue and insert a string for hanging.
I intended to piece together six snowflakes, when I got to five, there was no more room for another one.
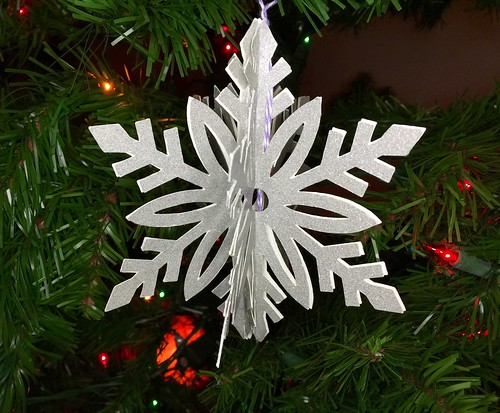
The finished snowflake.
Enter for a chance to win a Cricut Maker: a Rafflecopter giveaway
This is a sponsored conversation written by me on behalf of Cricut. The opinions and text are all mine.
Comments submitted may be displayed on other websites owned by the sponsoring brand.
#CricutHoliday #CricutMade #ad


