

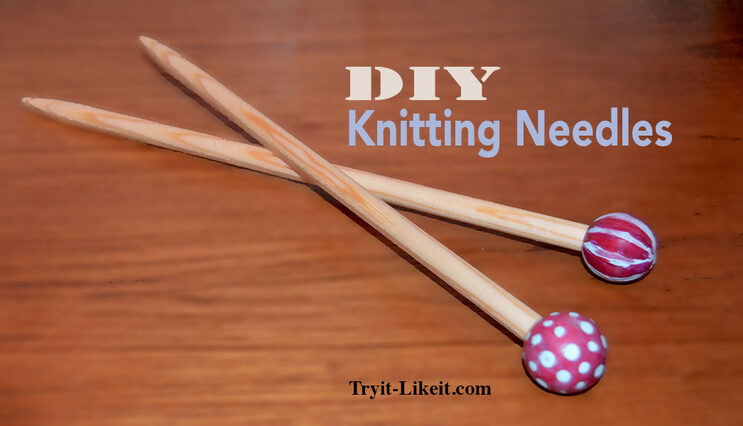
Making your own knitting needles is easy, less expensive, and very satisfying. Special thanks goes to my daughters teacher who is teaching her class to knit. With a few materials and a little time, you can create these stylish needles for your own use or a great gift.
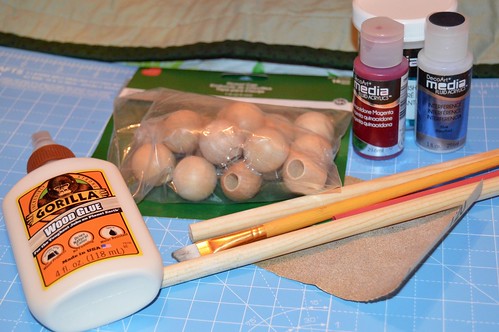
Materials:
- dowel rod
- a way to cut the dowel rod
- wooden end caps
- paint (I used DecoArt paints)
- brush
- x-acto knife
- straw
- sand paper
- coconut oil
- adhesive (I used Gorilla Wood Glue)
Directions:
Dowel Rods
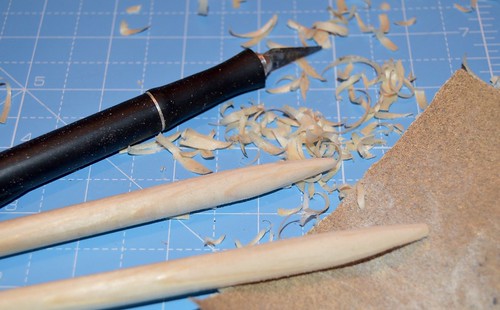
To begin, cut the dowel rod to the desired length. You will probably get three lengths from one rod. I used a dremel like tool to cut mine. Sharpen one end of each of two rods. This can be done easily on a pencil sharpener. Mine didn't fit so I whittled away with an x-acto knife, working around the dowel equally. This doesn't have to be perfect, you can adjust it with sanding. Sand the entire dowel rod and the point until smooth and the shape you desire. Do this for both. Set them aside.
End Caps
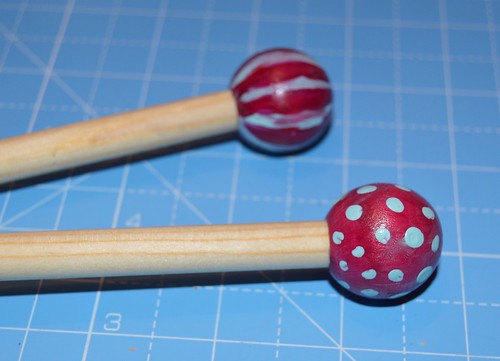
Cut your straw into two pieces. This will be used to put the end cap on while painting. Paint the end caps as you desire. I used paint and a gloss varnish. You could use paint markers, nail polish, or permanent markers. Really anything you would like to decorate them. Allow them to dry. Once dry, glue them onto the end the dowel rods.
Finish
I applied a bit of coconut oil onto the needles, rubbed it in and then rubbed the excess off with a paper towel. Furniture wax or something similar would work just as well.
It's that easy and the results are wonderful. With the materials in hand, it will probably take just under an hour including dry time.
Gorilla Glue and DecoArt provided material for other posts and were used here as well. This post includes affiliate links.


