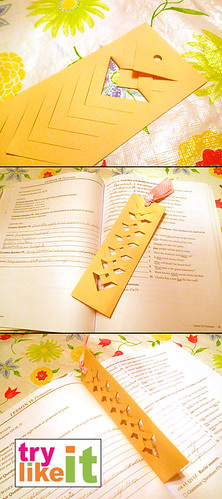
This folded bookmark is a quick and easy gift. I used my cricut to cut the lightweight cardstock but you could cut by hand if you wanted. I chose a solid colored paper for this tutorial so you could easily see the process but using a patterned paper could add another level of interest, especially if the paper was two sided.
To begin, use this free file to cut. [SVG file]

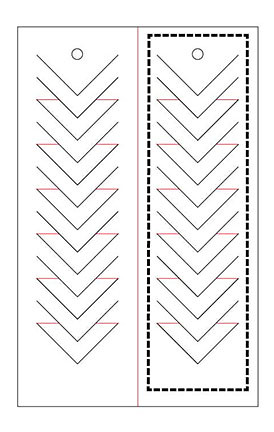
The file includes both cut and fold lines. So you can easily tell the difference, the fold (score) lines are created in red. Once you load the file into Cricut Design Space you will need to change those lines to score lines. Once done, select all layers and join them together. Now you can make the file whatever size you would like.
Now that it is cut out, you'll fold the file in half and use a bit of glue to hold it together. (the glue isn't completely necessary but it does help; I used a glue stick)

Apply your glue or double sided tape around the dotted line area - you don't need a lot. It doesn't need to be perfect.
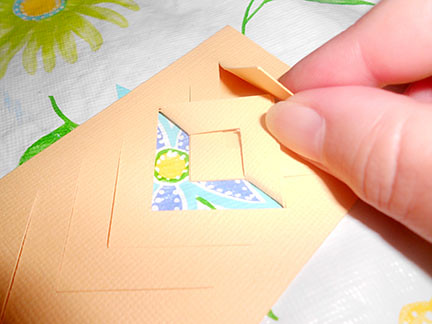
Now using every other V cut, you will begin to fold them up towards the punched hole. Do this on each size, one layer of paper.

Tuck it under the point it touches.
Once done, you can personalize it by added a ribbon to the top.
How to cut by hand:
If you are going to cut this out by hand, you can print out the image in the gluing diagram. All the black lines are cut lines and the red lines are fold lines. You may want to fold the paper first and then cut the V shapes making sure they line up together.


