

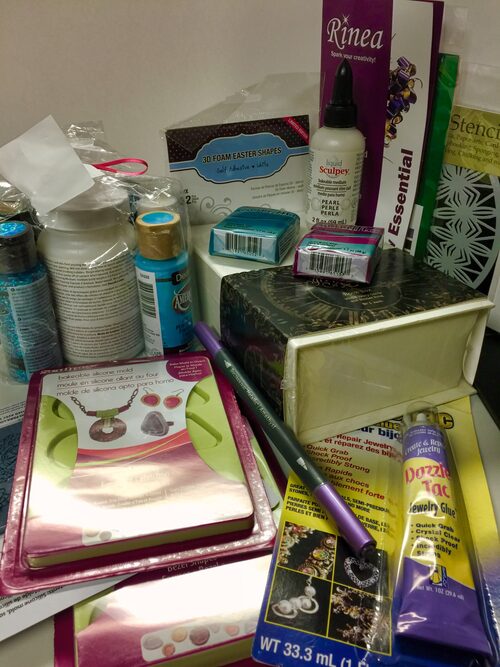
Designers who attended Creativation this year received a bag full of samples. We were challenged to create something using at least five of these materials. I made a jewelry box with jewelry enclosed. My process took multiple days and I will share some of the steps with you in this post. I really enjoyed the challenge and thankfully, the colors I received all went together well. The only item I didn't incorporate was the 3L sticky foam shapes. They were an Easter theme and I will use them in another post.
the materials
The following links are affiliate links.
The material list:
1) DecoArt: Paints & Pouring Medium - paint used
2) G45: Book Box - used
3) Rinea: Sample sheets - used
4) TCW: Stencil - used
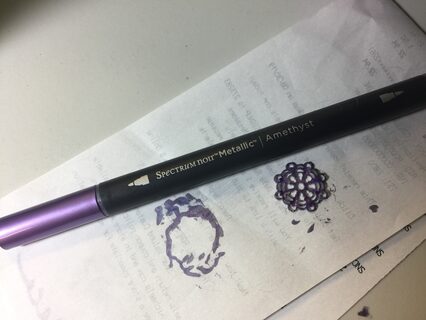
5) Crafter's Com.: Sparkle Marker - used
6) Sculpey Clay: Souffle Clay, Liquid, Molds - used
7) 3L: Sticky Foam Shapes
8) Beacon Adhesive - used
Additional materials used:
- DecoArt paint in white
- foam paint brush and a regular paint brush
- Sculpey clay in pearl
- jewelry findings and beads
- Silver leaf
- Future floor wax
- mirror
- jewelry pliers - round, flat, and wire cutter
working with the box
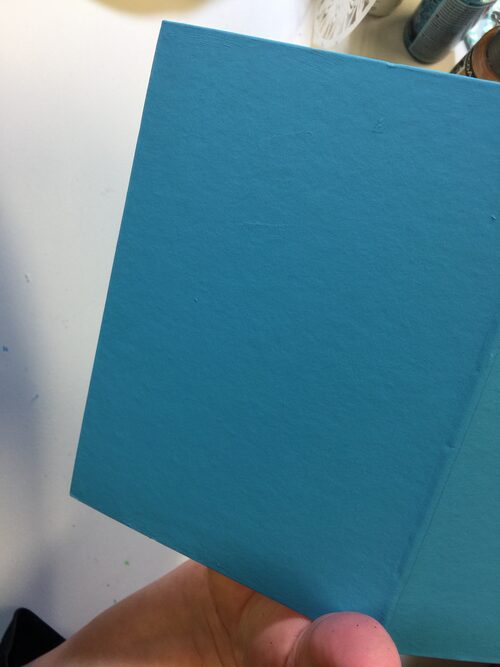
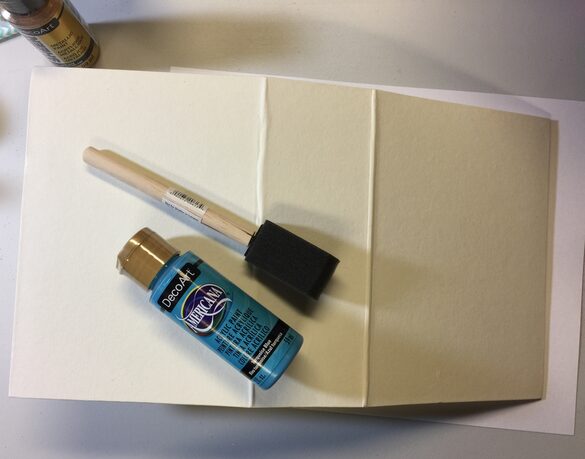
painted
I began with the box, painting the outside with the DecoArt paint I received. The box absorbed the paint well and dried quickly.
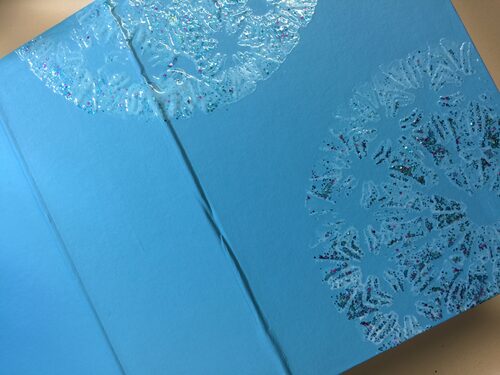
stenciled (wet)
I used the TCW mandala stencil with the DecoArt Galaxy Glitter paint. I mixed in a bit of white and blue paint to the glitter paint because I wanted the stencil to show up a bit more than the glitter paint would have done alone.
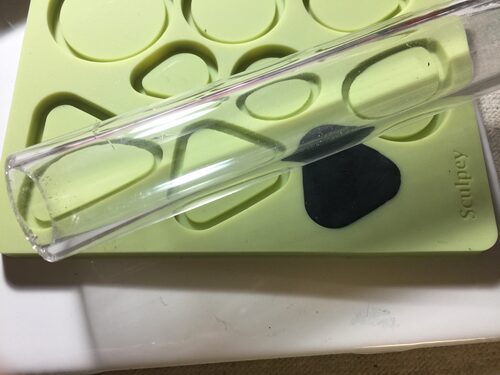
making the bezel
Setting the box aside, I started working with the Sculpey products. I have been making beads and jewelry for years so this was probably the most familiar product to me however, there were a few new additions. The liquid Sculpey mold was really nice to work with and you bake it in the mold. The two other molds created bezels and cabochons that work together, once again baking in the mold. I have never baked a mold before so that was a new product and process to me.
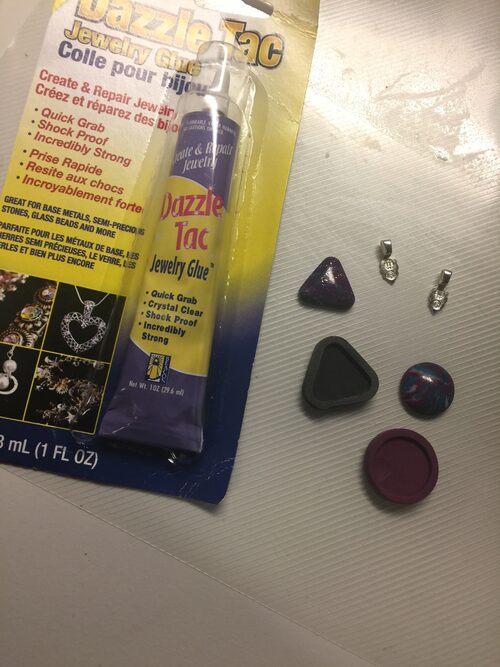
getting ready to glue
I used the Beacon adhesive to put the bezels and cabs together as well as attach the bail. It worked really well. This was my first time using Beacon but I am really happy to have it and I will continue to use it when making jewelry.
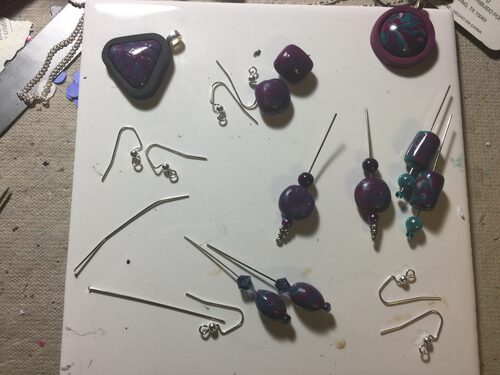
all the little parts
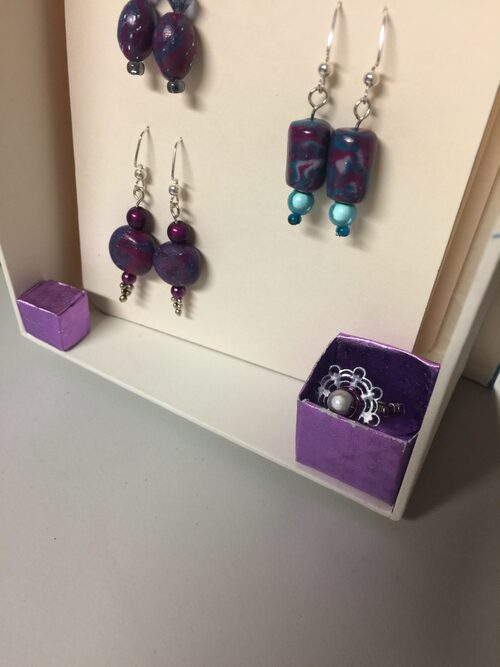
I made a few different beads with the Soufle Sculpey. I tried to focus on the two different colors as well as a color made by mixing them together. I added a bit of pearl Sculpey and Silver leaf to the blends. The process was just adding bits of clay together, twisting and shaping until I liked the color blend. The beads were shaped by hand except for one bead I used an old CD case to create a swirl of color. The jewelry finding pieces and accent beads I had on hand.
coloring the Sculpey
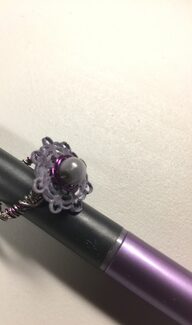
finished ring
Working with the liquid Sculpey shapes, I chose a medium size and then colored it with the metallic pen. I added a miracle bead and some silver and purple wire. The wires were wrapped in a boho type (loose wrapping - unevenly placed) to form the ring. A bit of the purple was brought to the top of the ring to wrap around the bead. The liquid Sculpey once baked was really durable. I also found that you can easily cut it with scissors, which I had done to another piece I was experimenting with.
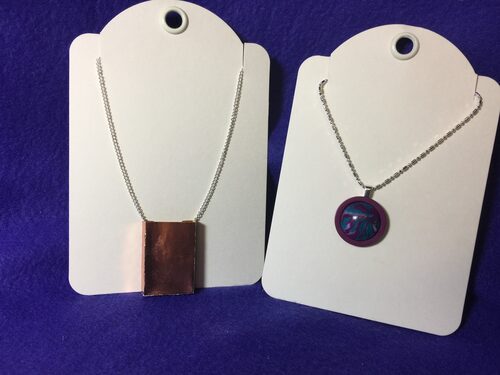
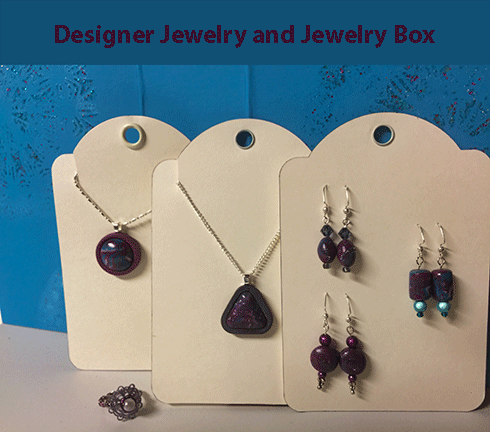
tag back with a small box, and front of a tag with a necklace

the tags were large enough to show an earring and necklace pair

three different earrings
Finishing up the jewelry box, I used the three tags enclosed in the Graphics 45 box to display the jewelry. I added shallow boxes made with Rinea paper to the backs of two tags to hold the excess necklace chain. I used the metallic pen to go around the edge of the tags.
the origami boxes
Folding origami boxes with the Rinea purple foil paper, I made two sizes. One to hold the ring, the other smaller box to work as a barrier for the tags to be held in the box.
Finishing off the jewelry box, I want to add a mirror inside the front flap.
I think it might be easier to see the final product if I show it to you through video:

Welcome to the AFCI Designer Section Challenge. Each designer has created a project using the same products that were given to us at Creativation. The challenge is to use the products and create something unique. We have some great companies that have sponsored this hop. Thanks so much for joining us! Be sure and visit all the great designers listed below:
Erin Reed
Janet Trieschman (you are here)
Ann Strecko Koeman (Annmakes)
Susie Bentz
Marjolaine Walker
Donna Budzynski
Terry Ricioli


