

I am not a huge craft stamper but I have always been intrigued by the alignment tools that are available. I just can't justify the price. I know they work well, I know their users love them. I just don't love the price. I've seen crafters make their own version and I finally decided I would make one for myself. It wasn't hard to make, it didn't take a lot of materials and it works well.
Materials:
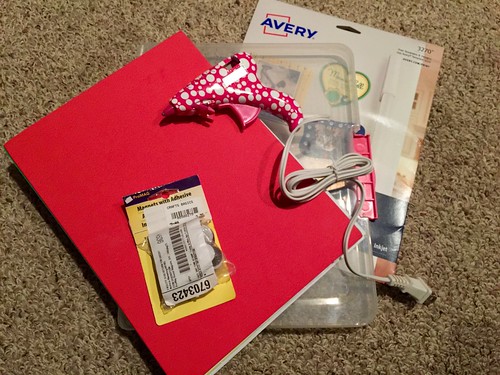
- Clear document container
- Hot Glue Gun (or Super Glue)
- Adhesive Foam Sheets 9 x 12
- Magnetic Printable Sheet 8.5 x 11
- Small magnetic dots
- Printer and printable grid [free printable grid]
Directions:
I bought my clear document container at a Yen store in California. You can find similar containers on Amazon [clear container]. What you want is a container that is slightly flexible, has no additional pattern or shapes on the front or back, and has a clasp closure. The container, of course, needs to be clear.
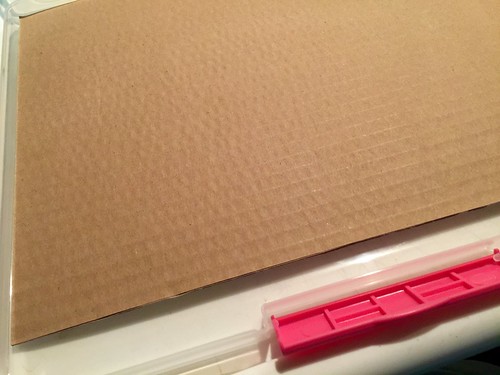
I glued the cardboard sheet from the craft foam package into the container first
The adhesive backed foam sheets were easy to use and I just kept layering them into the container
The next item I bought was a package of craft foam that was adhesive backed sized 9 x 12. It contained 6 colors of foam and a cardboard sheet. I used all of it to fill up one side of the document container. You can use a variety of different materials to fill the space but the craft foam allows it to be somewhat flexible to give a good stamp impression. This package is similar to the one I bought but it has more sheets. [foam sheets] The reason I like this pack is that they are adhesive which means the layers adhere smoothly.
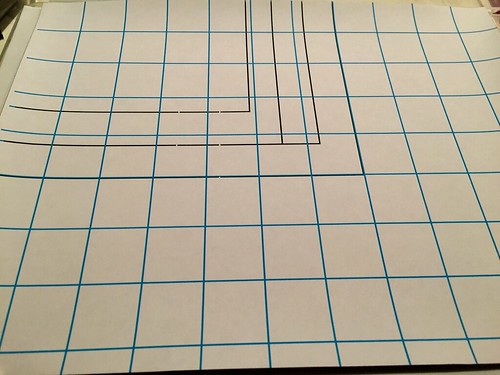
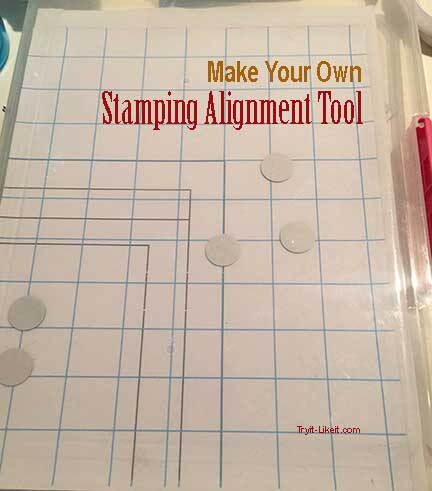
I created a card layout grid that I printed onto a printable magnetic sheet. The blue lines are 1" measures. The black lines are standard card sizes in vertical placement. The layout also has red lines for standard card sizes in the horizontal position. For some reason, my printer wouldn't print them. I must be out of red ink. I bought the magnetic sheets from Amazon. They are Avery brand and had 5 sheets of 8.5 x 11 in the package. [magnetic sheets]. This is the top sheet of the stack and I glued it into place, it would have been nice if it too was adhesive backed. My only regret is that the Avery Magnetic sheets aren't that strong of a magnet as I would like. If this is giving me issues, I can always use pieces of tape to hold the card in place. For the price, I am happy with the final results.
This is the tool in use. Placing the card blank onto the grid and holding it in place with small magnets. You could also use tape. Position the clear acrylic stamp onto of the card in the position you want. Close the document container and push on the stamp so the stamp adheres to the container. Open it, add ink to the stamp and close the container again using pressure to stamp the image. You can continue this process until your stamping is finished.
The stamping alignment tool works great for two-layer stamps.

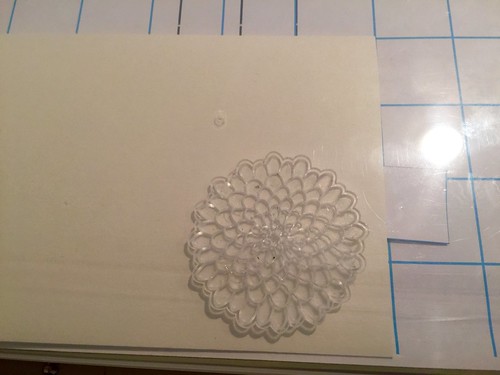
This is the first card I stamped using my new tool I made. The card is stamped and then colored with colored pencils. The text banner was actually stamped with a traditional wood back stamp and didn't stamp well. I went over the wording with a marker. Using the two different styles of stamps, I am 100% sold on my new stamping alignment tool I made.
Here is the comparison and breakdown of costs:
Break down of my cost
craft foam package $7.68 for 12 3.84 I used 6
5 magnet sheets for $7.68 1.54 I used 1 sheet
super glue 2 pack from dollar store 0.50 I used 1 tube
clear document container yen store 1.68
circle magnets 100 for $2.75 I used 6 0.17
TOTAL SPENT $7.73
Compared to Amazon Prices
Misti $ 69.95
Tonic by Tim Holtz $ 30.10
Memory Keepers $ 38.58
This post contains affiliate links. Try it -Like it - Create it will earn a small percentage of your purchase. These funds help support our site and there is no additional cost to you. Thank you for your support every little bit helps.


