

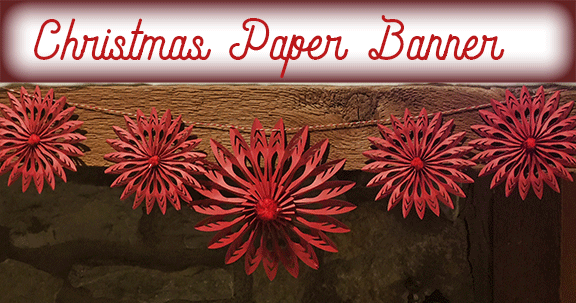
I wanted to make a Christmas Paper Banner for my mantle. I wanted to make something similar to paper snowflakes but using my Cricut Maker instead of scissors. I am not sure if they are snowflakes or flowers or mandalas, but I really like the results. The fact that they were cut on the Cricut Maker makes them quicker to cut and a lot easier to make duplicates as well as make them in different sizes while remaining identical in shape. After gluing, I added a pompom to the centers and strung them on red and white twine. Want to see how to make them? Just follow the step below.
________________________________________________________________________
I want to personally thank Cricut and ScraPerfect for providing materials for this post.
I am a design team member with Cricut and ScraPerfect.
The following links may contain affiliate links. They help support this site and cost you nothing to use them.
_________________________________________________________________________
Materials:
- Red Cricut Cardstock
- SVG for the snowflakes
- Cricut Maker
- Red sparkle Pom Poms (from the Dollar Tree)
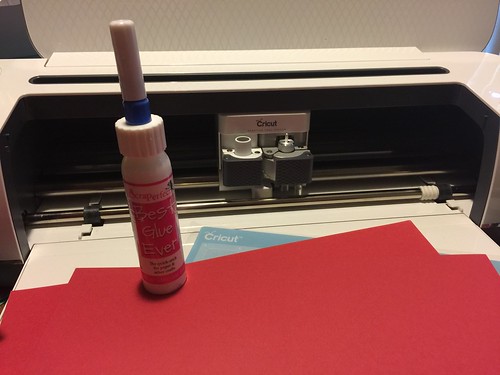
- adhesive (The Best Glue Ever)
- Twine (from the Dollar Tree)
Directions:
The process isn't difficult to make these snowflakes but there is a bit of drying time as well as a bit of time for the cardstock to learn to stay flat in it's new shape.
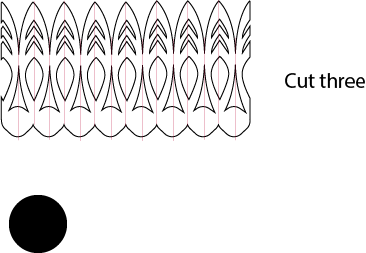
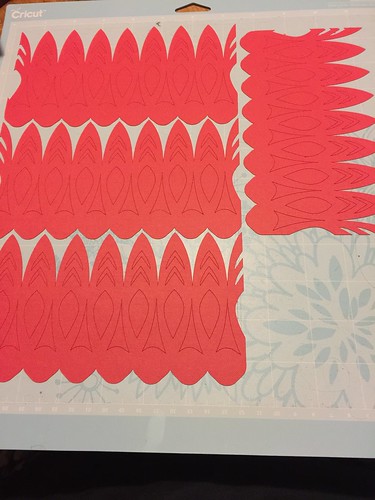
Working with the SVG file, Set the black to cut and all the red lines to score.
Cut three of the top image and one circle.
You can change the size of the file to change the size of the snowflake.
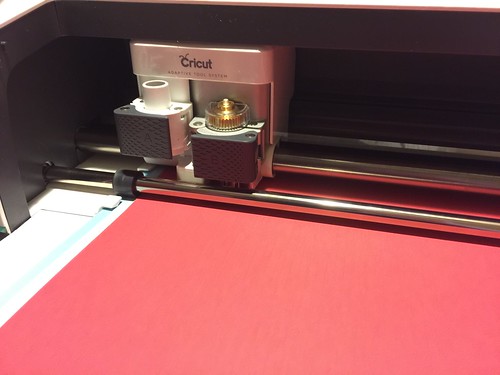
Cutting out the pieces for the snowflakes on the Cricut Maker.
 For my first try, I forgot the score lines for folding. Thankfully, the Cricut Score Tool works both in the machine and also when used by hand.
I went back into the file and redesigned it to include the score lines as well as the circle to glue to the center of the shapes.
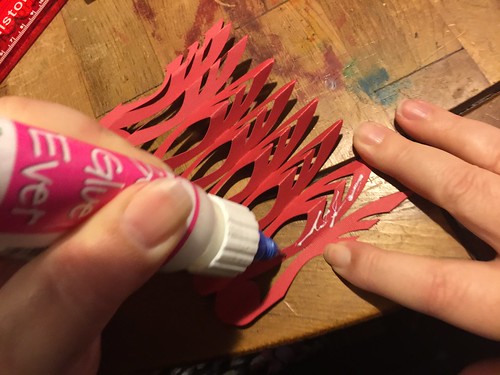 Using The Best Glue Ever, I attached two shapes together, overlapping two of the folded parts of the design.
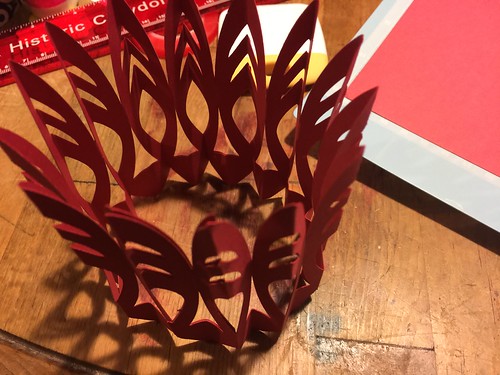
Attaching the third piece to the second and first piece make the paper into a crown shape.
 To get them to lay flat, I needed to add a circle to the center of the snowflake on the backside.
Then I used heavier objects to hold it all in place and to dry overnight.
Finally, I added a pompom to the center of each snowflake using a bit of glue.
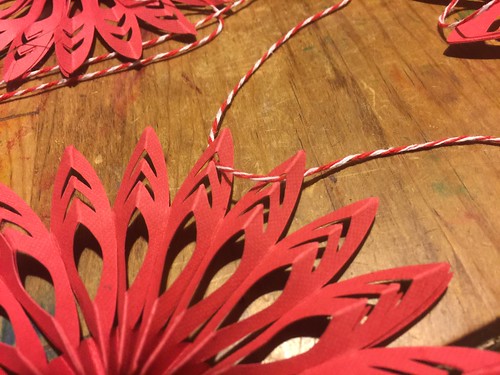
To string the snowflakes together, I went into one petal and back through another.
See the image above for a better explanation.
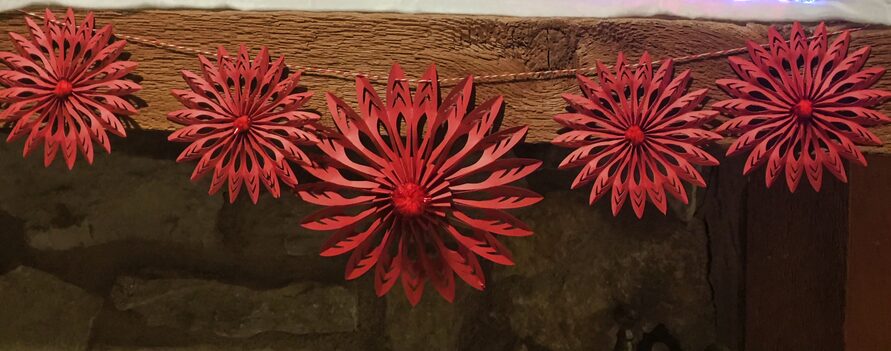 And then I hung it up.
I recommend using an odd number of snowflakes.


