

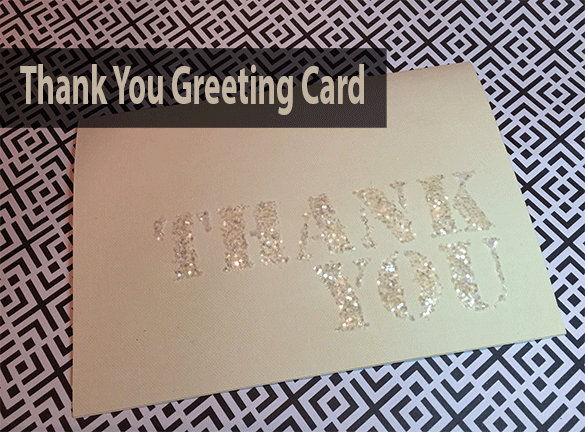
Christmas is over and it is time to send all your thank you notes for the gifts you received. Hand-written thank you notes are not a thing of the past and they will be a very welcomed piece of mail. Sending a thank you note is definitely a task every child needs to learn how to do. Why not have some fun with the process and make your own glittery thank you notes? This technique is really easy, a bit messy, and very fun to make.
________________________________________________________________________
I want to personally thank Cricut and ScraPerfect for providing materials for this post.
I am a design team member with Cricut and ScraPerfect.
The following links may contain affiliate links. They help support this site and cost you nothing to use them.
_________________________________________________________________________
Materials:
- personal cutting machine (Cricut Maker)
- SVG files [thank you card]
- glitter
- The Best Glue Ever
- light sticky tape
- Cricut Holiday Cardstock
Directions:
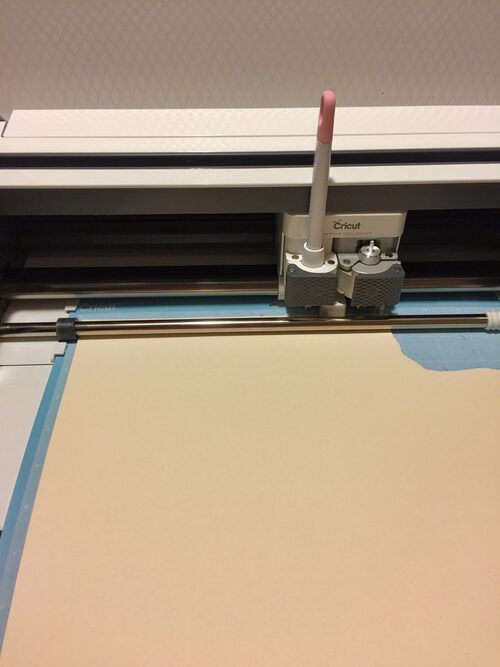
Using your personal cutting machine, cut out the card and the thank you stencil.
Black lines will cut, set the red line to score.
Fold the card in half.
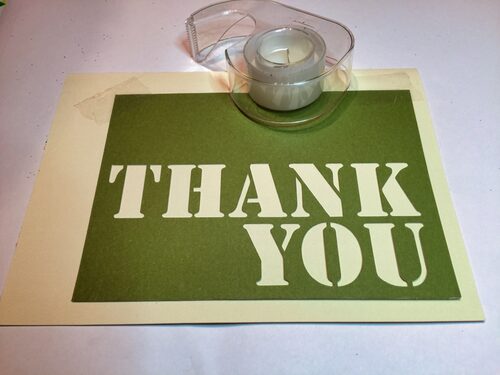
Attach the stencil where you desire with a bit of tape.
TIP: I used regular clear tape and stuck it to my pants first to pick up some fibers so the tape wouldn't stick tight and tear the paper.

Use the Best Glue Ever to fill in the words.

Here is the fun messy part, use your finger to smear the glue over the cutouts.
Use your other hand to hold the stencil in place.
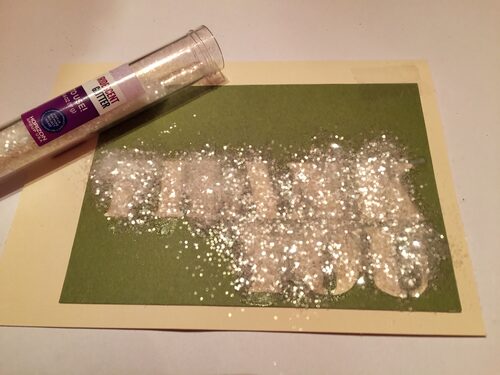
Cover the stencil with glitter.
Use your finger to push the glitter down, make sure the stencil is well covered.
Remove the stencil, tap off the glitter.
Return the excess glitter to the tube.
TIP: I placed another piece of paper below the card to catch all the glitter making it easier to collect and reuse.
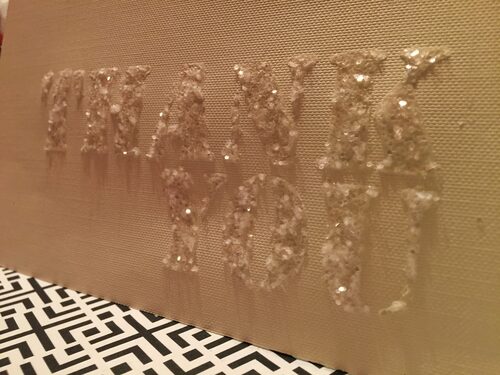
Close-up of the glitter on the card.


